by chris
Share
This is a job I’d been postponing for a couple of years now. The cockpit was scruffy from the day we first took on the boat with generations of random plaques, lights, knick-knacks having been added and removed over time leaving a patchwork of peeling stain and varnish along with a multitude of screw holes precisely in my line of sight.
I knew this job was going to require delicacy given the paper thin veneers used on Freemans, so the first step was scraping down with a Bahco scraper. This has the benefit of a very slightly chamfered blade which reduces accidental gouging. Although this worked fairly well, ultimately I removed the worst of the old varnish with ‘Peel-tec’, a spray on stripper which doesn’t burn your hands but does work extremely rapidly (within 10 minutes) whereas the ‘standard’ paint and varnish strippers were both ineffective, took too long to react and burned skin. Peel-tec was quite expensive at nearly £12 per can and I used four of them.
Preparation is of course key and I took the opportunity of plugging most of the obvious screw holes using 6mm teak plugs (rather than mahogany or sapele) as these were all I had to hand.
I did go through the veneer at one point, revealing a very light coloured substrate. This was the clincher in deciding to stain to even out the colours and potentially add depth.
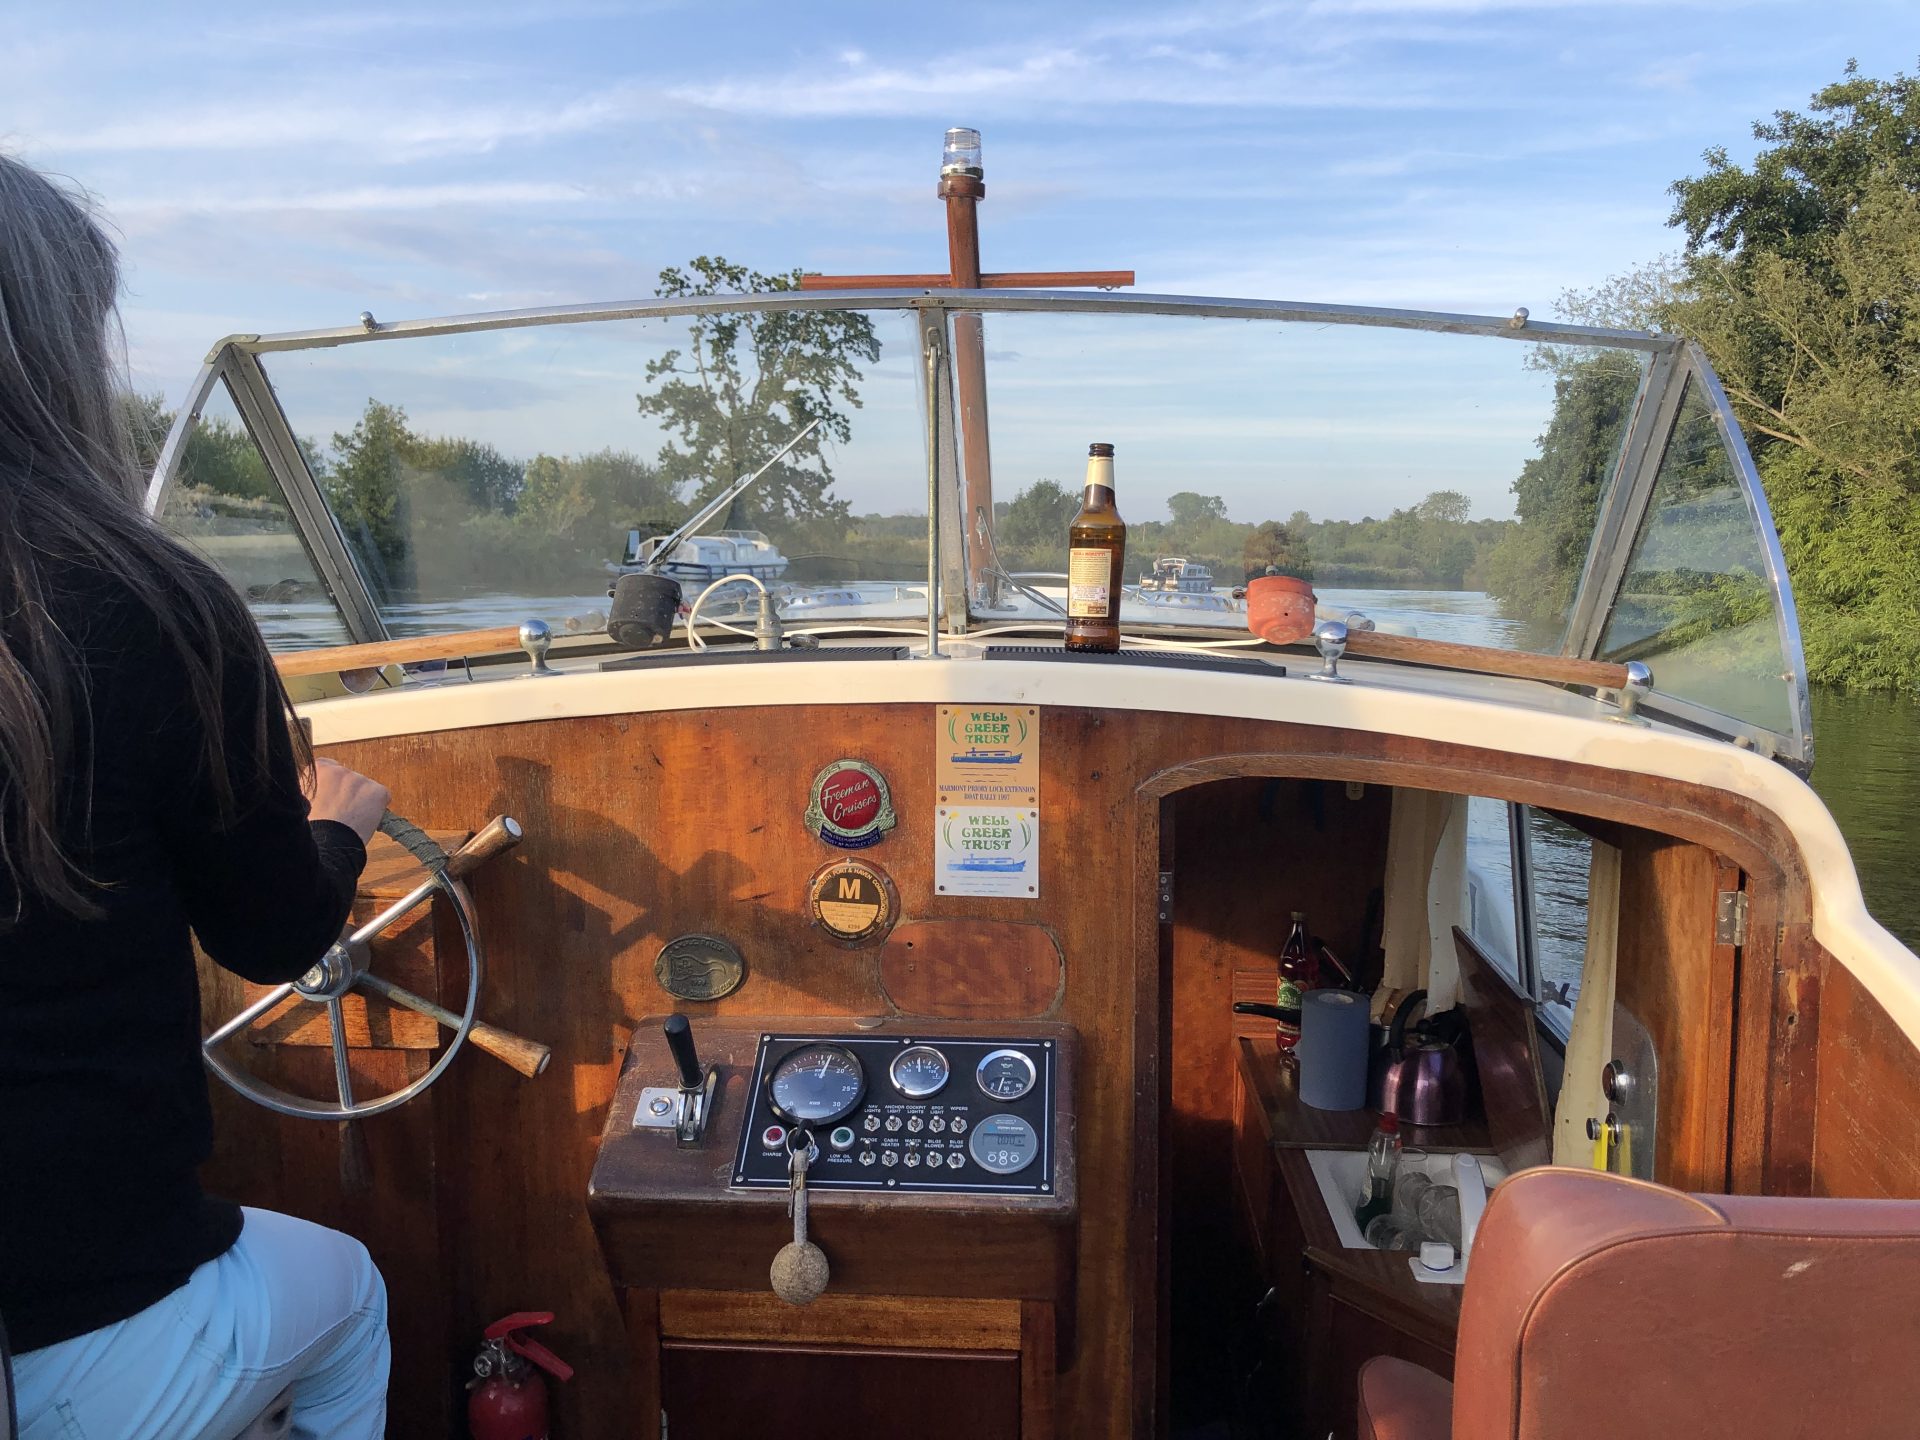
Cockpit bulkhead several years before re-varnishing

Cockpit bulkhead after re-varnishing with 7 coats of Epifanes


I stained the whole cockpit with Epifanes Classic Mahogany which initially looked horrible but was clearly essential. Following this, I chose to use Epifanes Woodfinish Gloss to build up the coats. As it didn’t require sanding between coats (if overcoated within 72 hours), it gave me options. Un-sanded, the build was quick but if for any reason I was unable to get to the boat for another 24 hours, all would not be lost.
I followed most of the accumulated wisdom in varnishing with Epifanes such as thinning the first coat by 50% using the Epifanes brush thinners. Much has been made of using this expensive solvent but I wasn’t going to take any chances or cut corners. Subsequent coats were thinned less by degrees with the final Woodfinish Gloss coat going on un-thinned. This was tricky as temperatures were high and application was becoming marginal.
The final coat was done with Epifanes Clear Varnish, un-thinned. I say un-thinned, but I did have to use a small splash of brush thinners to make it workable in the heat.
I’m happy with the outcome, having sanded every couple of coats to tidy up any curtains or runs but there was no way I could achieve perfection with the combination of temperature, condition of the woodwork and inability to remove any more surface for fear of destroying the veneer.


Of course the varnish remains quite soft until cured over the course of a few weeks so I’m treading carefully. It goes without saying that re-assembling everything resulted in some very minor dings and scuffs but it’s a boat that gets used after all.
One thing is for sure, I will be giving it an annual maintenance coat as it’s a lot easier than stripping everything back down to bare wood.
This was a labour of love as seven coats of varnish were needed and each coat required me to drive a three hour round trip to the boat on top of sanding.